


I’m not going to lie to you. This Winter Wonderland Battenburg Cake nearly stole my sanity. It took a few cracks to get it just right because, girl, this cake is fin-nick-y! Now, if you’re a detail-oriented, seasoned baker I’m sure you’ll barely break a sweat. But if you’re a mere mortal like me, usher any nearby children out of the house because they’re will be f-bombs abound.
Jump to Recipe
Does all my complaining mean you shouldn’t make this snow beast of a cake? Heck no! Make a mess, screw up, be kinda crap at something. It actually is fun! And you know what is even more fun? When you actually kill it. Succeeding at something easy isn’t satisfying. Succeeding at something hard is. And if you plunk this bad boy down in front of someone and they don’t praise you to the heavens, consider it a litmus test for assholery. So, let’s do this!
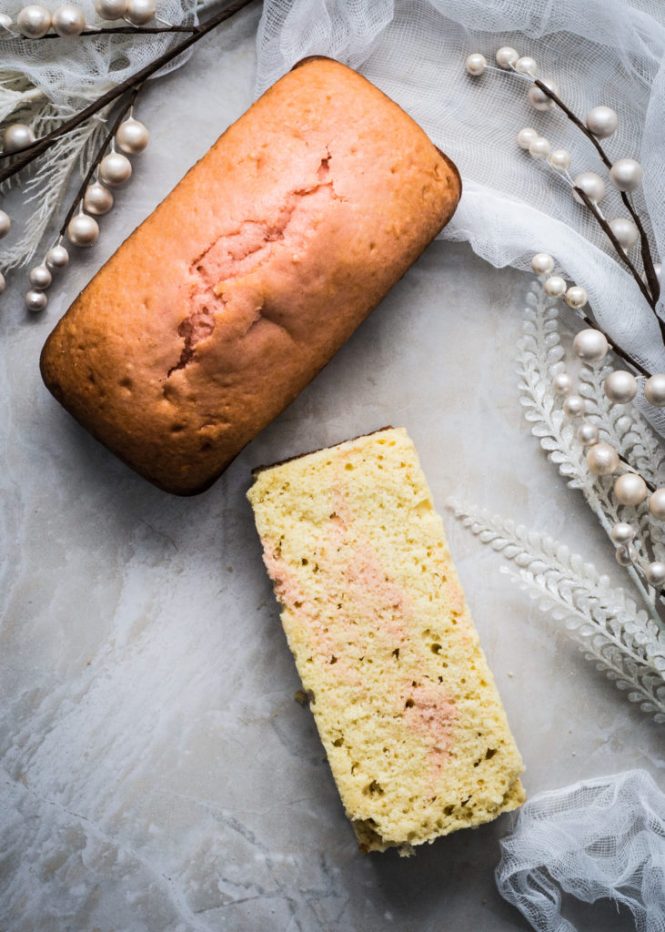
Now, the whole Winter Wonderland Battenburg Cake experience starts innocently enough with a sponge cake recipe. Yeah, it will definitely lull into a misguided level confidence. But don’t worry we’ll take care of that. So, yeah, you bang out a sponge cake in two loaf pans and you let ‘em cool, then you chill them. And then, well, you stare at them, terrified holding a serrated knife aloft. This is normal. Trimming a cake all even-like is the stuff frustration dreams are made of.

I’ve never been particularly gifted at cutting in straight lines. I am particularly challenged when comes to the medium of cake. If you want a slight diagonal, I’m so your girl. But straight? Nope. Hard nope. So, if you’re like me, get yourself a solid cake leveler. It will save your very life because now, we’re going to trim those loaves of cake into two *even* rectangles. Did your stomach just drop to your ass? I so feel you.

Once the trimming is over, it’s pretty much clear sailing from there…No, no it’s not. There is still the matter of the white chocolate leaves. And no, you shouldn’t skip them. Look how pretty they are!! And more importantly, if you at any point tear your marzipan, they provide very good cover. Plus, what’s a Winter Wonderland Battenburg Cake without white chocolate leaves? Nothing worth mentioning.

Now, actually making the white chocolate leaves is a snap. All you have to do it paint some melted chocolate on some bay leaves and shove them in the fridge. It’s the removing of the chocolate from the said bay leaves that’s tricky. It’s not necessarily hard to do, it’s just fussy. You will break one or two, so always make more white chocolate leaves than you think you will need. You can do it!

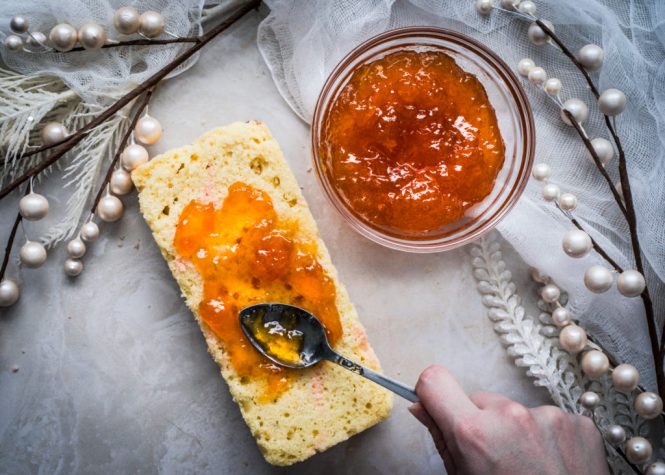
Okay, now we really and truly have reached the end of all the tough stuff. No, I really mean it this time. Covering the cake in marzipan isn’t actually all that difficult. It was way easy than this monstrosity, that’s for sure. The one tip I would give is, puree your apricot jam. I did not and my jam had a few fruity chunks. Do these “real fruit” chunks enhance your enjoyment when placed on toast? Well, sure, if you’re into that sort of thing. Do they make for an even surface on which to lay marzipan. Oh hell no! So, yeah throw your quality jam into a food processor to make all nice and smooth before smearing it all over your cake.

From there, it’s just a decorating party, which I think we all agree are the best parties. And if you make all the components for this cake a day ahead, you can really take your time beautifying your masterpiece on the day.

Now, I’m sure you’re looking for a history lesson. I mean, did I hold back delving into Peaches Melba or how about my long-winded account of pimento cheese or the ice cream float. Surely, I must have something up my sleeve for a cake as storied as the Battenburg Cake. But I don’t. Like any good (lazy) historian, I started my research with a brief visit to Wikipedia but I was *very* put off when I saw the history of the last name Battenburg.

It seemed like a very complex affair involving the intricacies of German and British aristocracy and royalty, which is just not my jam. I’m not about to have flashbacks to my Medieval England class where I had to memorize the royal family tree leading up to the War of Roses. People got busy with a lot of close relatives all of whom had no end of titles or names. Then there were the alliances through marriage between different nations, which lead to a lot of inbred British people with thoroughly unBritish names. No shade or anything, it just made for difficult memorization. But I digress. The short answer is the Battenburg cake seemed difficult to explain/trace so I didn’t do it. Be better than me and give it a go.

So, that’s what’s up with this Winter Wonderland Battenburg Cake. A classic British teatime treat all dressed up for winter. This baby is the perfect ambitious baking project for your holiday downtime, so let’s do this.

Enjoy!
FollowIngredients
Method
- Preheat the oven to 350°F. Grease two loaf pans and line with parchment paper. Set aside.
- Sift the flour, baking powder, baking soda, and salt together in a large bowl. Whisk to combine and set aside.
- In a separate bowl, whisk the eggs, sugar, buttermilk, oil, and almond extract together until smooth. Form a well in the center of the dry ingredients and pour in the wet. Stir to combine. Set aside.
- In a small bowl, whisk to combine the red color gel and the water. Ladle roughly 2 1/4 cups of the cake batter into one of the prepared pans. Pour the color gel mixture into the remaining batter and stir to combine. Pour the pink batter into the other prepared pans. Tap both pans on the counter to eliminate any air bubbles.
- Transfer the cakes to the oven and bake for 35 minutes or until set in the center. Remove the cakes from their pans and let cool to room temperature. Wrap the cakes tightly and transfer to the fridge. Let chill for at least 2 hours or overnight.
- Trim the sides and tops of the cakes into two evenly-sized rectangles. Spread apricot jam on top of both of the cakes, then sandwich them together. Using a serrated knife, cut the cakes in half lengthwise. Turn each half to lay flat on the counter and spread apricot jam on top. Arrange the cakes so the jam sides meet and the colors alternate. (see photos). Wrap the cake in plastic and chill for 1 hour.
- While the cake is chilling, melt the white chocolate and, using food-safe paint brushes, brush the surface of each bay leaf with white chocolate. Make sure the chocolate coverage is even across the entire leaf. Place the leaves on a small baking sheet and transfer to the fridge for at least 1 hour.
- Form a divet in the center of your marzipan and place the blue color gel in the center. Dust a surface with an ample amount of confectioner’s sugar and knead the color into the marzipan until evenly dispersed. This will take roughly 10 minutes.
- Roll the marzipan out to a large rectangle and take your chilled cake and spread apricot jam on one of the sides. Place the cake jam-side-down on the edge of your rolled out marzipan closest to you. Use a pizza cutter to trace the marzipan around the dimensions of the cake. Spread more jam on the side of the cake facing away from you. Flip the cake away from yourself, so the jam-side falls on the marzipan. Once again use the cake as a guide to trim the marzipan. Repeat until the cake is completely encased, with the exception of the ends. Trim the remaining marzipan away. Transfer to the fridge.
- Carefully peel the chocolate away from the bay leaves using tweezers. Chill the leaves until ready to use.
- Decorate the cake using whipped cream, snowflake quins, and white chocolate leaves. Finish the cake with a dusting of confectioner’s sugar. Keep refrigerated until ready to serve.


2 Comments
This cake is so pretty! I love the decorations!
Thanks so much, Natalie! It was a labor of love. <3